Yes, Left-Handed Writers Can Master Calligraphy
Historical calligraphy systems were designed by right-handed writers working in scriptoriums, which explains why so many traditional calligraphy techniques assume right-hand dominance. But that's changing. According to research published by the Society of Scribes and Illuminators, approximately 12-15% of their master-level members are left-handed—roughly matching the general population.
The key difference? Left-handed calligraphers need to adapt their approach to paper positioning, pen grip, and tool selection. Once you understand these modifications (which I'll cover in detail below), you'll find that being left-handed can actually give you unique advantages in certain calligraphy styles.
What Is the Best Left-Handed Calligraphy Setup for Beginners?
The easiest left-handed setup is a brush pen, smooth paper angled 15 to 45 degrees, and an underwriting hand position that keeps your palm below the wet ink. For pointed pen scripts, add quick-drying ink and consider a left-handed oblique holder.
If you only read one part of this guide, make it this one. The checklist below is the configuration most left-handed calligraphers settle on after months of trial and error, and you can copy it on day one. The deeper sections that follow explain the reasoning, the grip variations, and the tool upgrades in full. To pick a first script, see our calligraphy beginner guide, and for tool details read the calligraphy pen guide.
Left-handed calligraphy setup checklist
| Setup choice | Beginner recommendation | Why it helps |
|---|---|---|
| Hand position | Underwriting first | Keeps your hand below the wet strokes |
| Paper angle | Rotate 15 to 45 degrees clockwise, or as comfortable | Improves stroke direction and visibility |
| First pen | Brush pen or monoline marker | Forgiving and low-maintenance |
| Pointed pen upgrade | Left-handed oblique holder | Helps you maintain nib angle |
| Ink | Quick-drying black or walnut ink | Reduces smudging |
| Paper | Smooth, bleed-resistant paper | Prevents snagging and feathering |
Quick troubleshooting for common left-handed problems
| Problem | Likely cause | Fix |
|---|---|---|
| Smudging | Hand crossing wet ink | Rotate the paper, underwrite, and use faster-drying ink |
| Scratchy upstrokes | Nib angle too steep | Adjust the paper angle or holder |
| Uneven slant | Arm and page not aligned | Mark a guideline angle |
| Heavy pressure | Using a pointed pen too early | Practice with a brush pen first |
Why Left-Handed Calligraphy Feels Different
Left-handed writers face four main challenges when learning calligraphy—but each one has a straightforward solution.
Understanding what makes left-handed writing different helps you choose the right adaptations. The International Association of Master Penmen, Engrossers and Teachers of Handwriting (IAMPETH) has documented these challenges extensively in their left-handed instruction manuals dating back to the 1950s.
Challenge 1: Hand Obstruction
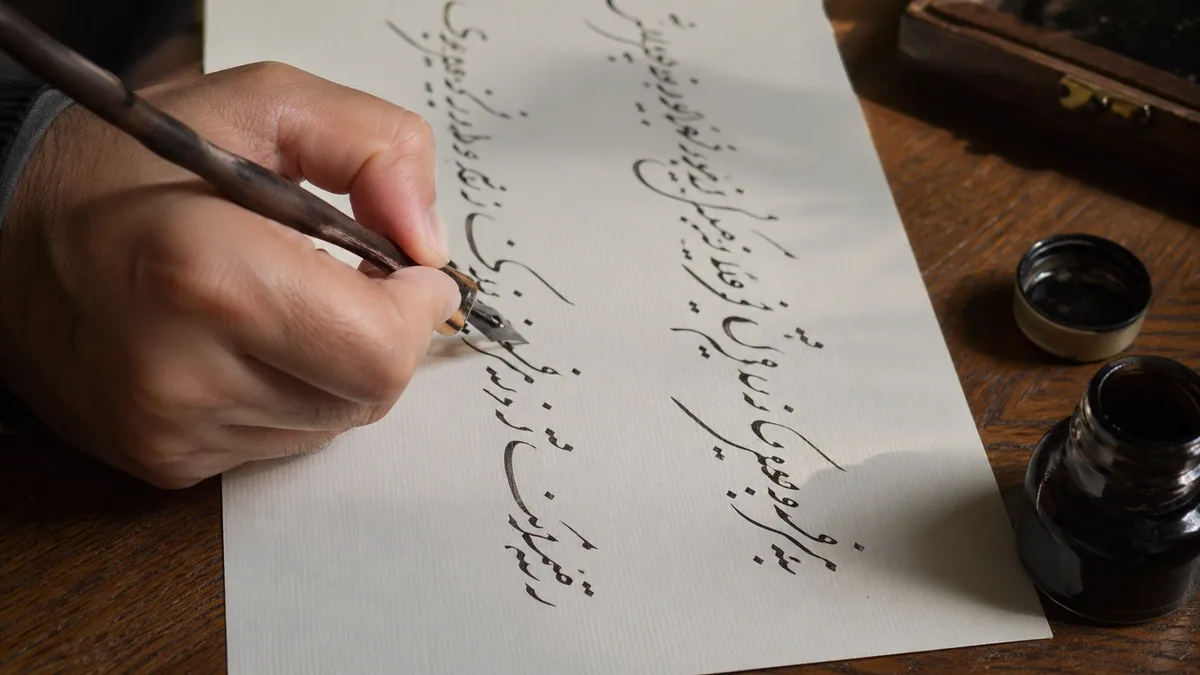
Your hand naturally moves across and covers what you've just written. Right-handed writers pull their hand away from completed letters; left-handed writers push into them, which makes it harder to gauge spacing and line consistency in real time. The fix is mostly mechanical: rotate the paper 45-60 degrees clockwise so the writing line angles up and away, then drop into an underwriting position (covered in detail below) so the hand sits beneath the baseline rather than hooked over it.
Challenge 2: Ink Smudging
Because you write from left to right while your hand also moves left to right, you're constantly dragging your hand over wet ink. This is especially problematic with slow-drying calligraphy inks and certain paper types.
Solution: Use quick-drying inks (iron gall or waterproof formulas), place a guard sheet under your hand, and choose non-absorbent papers that let ink set faster.
Challenge 3: Push vs. Pull Motion
Traditional calligraphy assumes you're pulling the pen toward you on downstrokes and pushing lightly away on upstrokes. Left-handers often end up pushing the pen on the downstroke instead, and a sharp nib catches paper fibres the moment that happens, leaving railroad tracks or stuttered lines. Two things make this manageable. Start on flexible brush pens or smooth-nib fountain pens, which glide either direction. Then, once the motion is reliable, move to traditional nibs paired with the paper rotation above so most of your strokes still pull rather than push.
Challenge 4: Pen Angle Problems
Most traditional calligraphy styles require the pen to be held at a specific angle (typically 30-55 degrees) to create the characteristic thick and thin strokes. Left-handed writers naturally hold the pen at a mirror-opposite angle, which produces reversed thick-thin patterns.
Solution: Use left-handed oblique pen holders that angle the nib correctly, or choose calligraphy styles that are more forgiving about pen angle (like modern brush lettering).
Three Essential Techniques for Left-Handed Calligraphy
Master these three techniques and you'll address the issues that account for most of the friction left-handed calligraphers report.
These aren't workarounds—they're legitimate techniques used by professional left-handed calligraphers. Master calligrapher Patricia Lovett, a left-handed scribe whose work appears in the British Library, has taught these methods to thousands of students through the Calligraphers Guild.
1. Paper Positioning & Rotation
This single adjustment solves multiple problems at once.
Instead of keeping your paper straight in front of you (like you would for regular writing), rotate it 45-60 degrees clockwise. The top-right corner should be closer to you than the top-left corner. This means your writing line angles upward from left to right.
That single rotation pays for itself in four ways. Your hand stays below and to the left of fresh ink, so you can actually see what you've just written and you stop dragging your palm through wet strokes. The pen also meets the paper at an angle much closer to what traditional broad-edge hands assume, and your wrist relaxes into a far less strained position.
The exact angle depends on your natural writing posture. Most left-handed calligraphers find their sweet spot between 50-60 degrees. Try different angles during your practice sessions and pay attention to which feels most natural. You can also use our practice sheet generator to create guidelines at various angles to test.
2. The Underwriting Technique
Keep your hand below the line of text instead of hooking over it.
Many left-handed people develop a "hook" grip in elementary school—curling the hand over and around to see what they're writing. For calligraphy, this creates massive problems with pen angle and ink smudging. The underwriting technique fixes this.
How to Underwrite Properly:
- Position: Your hand and wrist should rest entirely below the line you're writing on. Think of your hand as a platform supporting the pen from underneath.
- Wrist angle: Keep your wrist relatively straight—not bent sharply upward or hooked downward. A straight wrist reduces fatigue and improves control.
- Movement source: Move from your shoulder and elbow, not just your fingers. This gives you smoother, more consistent strokes.
- Paper angle: This works best when combined with the 45-60 degree paper rotation mentioned above.
Research on motor learning (Applied Cognitive Psychology, 2019) shows that it takes about 3-4 weeks of consistent practice to retrain your hand position if you're used to overwriting. Be patient with yourself during this adjustment period.
The underwriting position feels awkward at first if you're used to hooking your hand, but it's worth the discomfort. After two weeks of 15-minute daily practice, most students report that underwriting feels completely natural.
3. Modified Pen Grip for Proper Angle
Small adjustments to your grip make traditional calligraphy angles achievable.
Different calligraphy styles require different pen angles. Copperplate needs 52-55 degrees, Italic uses 45 degrees, and Foundational Hand works best at 30 degrees. Left-handed writers need to adjust their grip slightly to hit these angles consistently.
Start by gripping the pen about an inch to an inch-and-a-half higher up the barrel than you would for everyday writing - that small change alone gives you noticeably better angle control. Build a stable tripod with thumb, index, and middle finger, letting the barrel rest in the valley between thumb and index. Spread the pressure evenly across all three fingers; squeezing too hard is the most common cause of shaky hairlines. And for the first few weeks, glance down at the nib angle every few letters. It drifts more than you'd expect, especially as the hand warms up.
For pointed pen styles (like Copperplate), consider investing in a left-handed oblique holder (covered in the tools section below). These holders angle the nib for you, so you don't have to contort your wrist to achieve the correct slant.
Best Tools and Materials for Left-Handed Calligraphers
The right tools make left-handed calligraphy significantly easier—especially when you're just starting.
You don't necessarily need "left-handed" versions of every tool. But certain materials work much better for lefties than others. These recommendations come from extensive testing with left-handed students in calligraphy workshops, as well as advice from master calligraphers who are left-handed themselves.
Top Tool Recommendations
If you're just starting, brush pens are your best friend. They're forgiving about pen angle, they don't catch on paper fibers when pushing, and they teach you pressure control naturally. Most modern calligraphy styles work beautifully with brush pens.
Specific recommendations:
- • Tombow Fudenosuke Hard Tip — Firm tip gives you excellent control. Great for smaller lettering and detailed work.
- • Pentel Fude Touch Sign Pen — Flexible brush tip that responds to pressure. Very beginner-friendly and inexpensive.
- • Tombow Dual Brush Pens — Available in 100+ colors. Larger tip works well for bigger letters and decorative work.
- • Sakura Pigma Brush Pen — Waterproof, archival-quality ink. Smaller tip perfect for addressing envelopes.
Try these out using our cursive generator tool to visualize different letter styles before you commit to practicing them.
These are fountain-style pens with wide parallel-plate nibs. The brilliant thing about Pilot Parallel Pens: they work equally well for left-handed and right-handed calligraphers without any modification. The ink flows smoothly in any direction, and you're not fighting against nib resistance.
Why they're perfect for lefties:
- • No pushing resistance—the nib glides smoothly even when you're pushing strokes
- • Available in 1.5mm, 2.4mm, 3.8mm, and 6.0mm widths (start with 2.4mm or 3.8mm)
- • Quick-drying ink cartridges that minimize smudging
- • Relatively inexpensive ($8-12 per pen)
- • Great for Italic, Foundational, Gothic, and Uncial scripts
If you want to learn pointed pen calligraphy styles (Copperplate, Spencerian, Engrosser's Script), you'll eventually want a left-handed oblique holder. These are specially designed to angle the nib correctly for left-handed writers without requiring extreme wrist contortion.
Where to find them:
- • Speedball Oblique Pen Holder (Left-Handed) — Affordable option ($10-15). Good for testing if you like pointed pen work.
- • Custom oblique holders from Etsy — Many calligraphy artists sell beautifully crafted left-handed holders ($30-60). Search for "left handed oblique pen holder."
- • John Neal Bookseller — Specialty calligraphy supplier that stocks left-handed oblique holders and nibs.
Don't buy an oblique holder until you've practiced with straight holders or brush pens first. Get comfortable with basic letterforms, then add the complexity of an oblique holder.
Smudging is the left-handed calligrapher's constant enemy, and ink choice is the single biggest lever you have over it. Different inks dry at different speeds - some in 2-3 seconds, others take 15-20 seconds.
Best fast-drying options:
- • Higgins Eternal Black — Dries in about 5 seconds. Waterproof when dry. Slightly thicker consistency works well with dip pens.
- • Iron Gall Ink — Historical ink formula used in medieval manuscripts. Dries almost instantly (2-3 seconds). Slight purple-brown tint when wet, dries to dark brown-black.
- • Speedball Super Black — Reliable, fast-drying (4-6 seconds), and available at most art supply stores.
- • Sumi Ink — Traditional Japanese ink. Extremely dark, dries quickly, permanent when dry.
Avoid India ink initially—it's very slow-drying and will frustrate you. Save it for later when your technique improves and smudging becomes less of an issue.
Essential Accessories That Make a Huge Difference
Guard Sheet (Critical for Lefties)
Place a sheet of smooth paper under your writing hand. This creates a barrier between your hand and the page, preventing smudging and keeping oils from your skin off the writing surface. Use bond paper or parchment paper—nothing textured.
Smooth, Non-Absorbent Paper
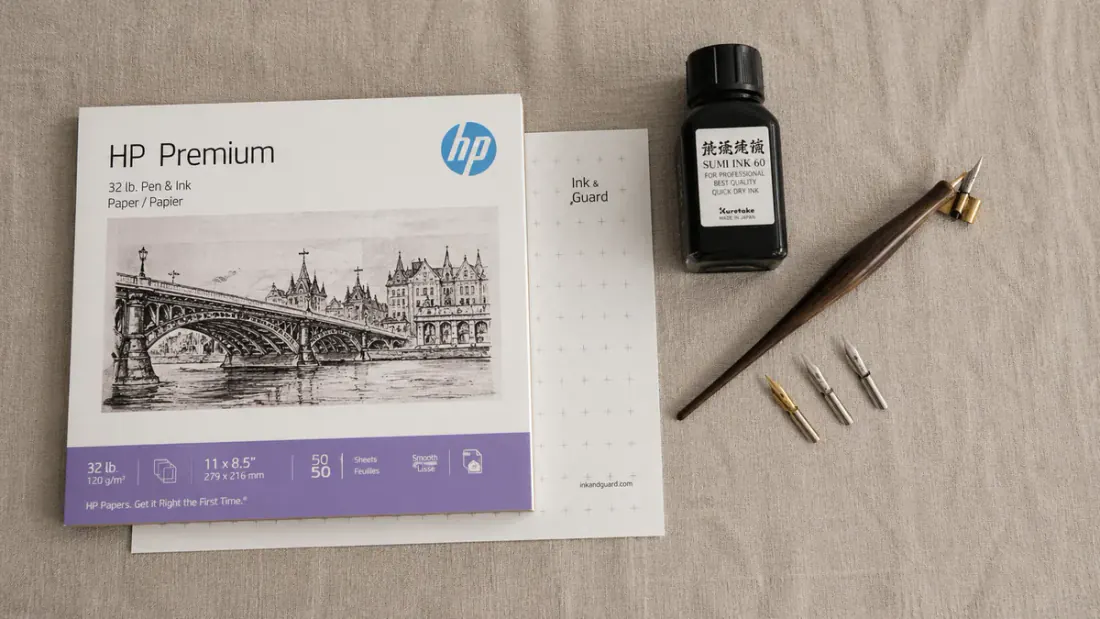
Choose paper that lets ink sit on the surface momentarily before drying, rather than absorbing immediately.Rhodia pads, HP Premium 32lb paper, and Canson marker paper all work excellently. See our full guide on calligraphy paper types for detailed comparisons.
Angled Drawing Board
A board tilted at 30-45 degrees improves your posture, reduces hand cramping, and gives you better visibility of your work. You don't need an expensive drafting table—a large 3-ring binder propped against a stack of books works fine.
Right-Side Lighting
Position your desk lamp to the right side of your workspace. This prevents your hand from casting shadows across what you're writing. Natural light from a window works great if positioned correctly.
Practice Guidelines and Worksheets
Having properly spaced guidelines helps you maintain consistent letter height and slant angle. Create custom practice sheets for your specific needs using our practice sheet generator, or follow a structured practice plan with our 30-day calligraphy challenge calendar.
A complete beginner setup (brush pen, practice pad, guard sheet, and guidelines) costs about $15-25. You don't need expensive calligraphy tools to start—focus on technique first, then gradually expand your collection as you determine which styles you enjoy most.
Which Calligraphy Styles Work Best for Left-Handed Writers?
Some calligraphy styles are naturally more forgiving for left-handed writers than others.
This doesn't mean you can't learn any style—it just means certain styles have a gentler learning curve. The key factors: how strict the pen angle requirements are, whether the style uses pushing or pulling strokes, and how much the letter forms depend on thick-thin contrast.
Easiest to Learn (Start Here)
Modern Calligraphy / Brush Lettering
This is the most forgiving style for left-handed beginners. The rules are flexible, you can use any comfortable pen angle, and brush pens work beautifully without fighting against the grain. The focus is on downstroke pressure and upstroke lightness, which lefties can achieve just as easily as right-handed writers.
Recommended pen: Tombow Fudenosuke or Pentel Touch
Italic Script
Italic has straightforward angles (typically 45 degrees) and adapts well to paper rotation. The letters are less rigid than formal scripts, and left-handed writers can often maintain proper angle with paper rotation alone—no special equipment needed.
Recommended pen: Pilot Parallel Pen 2.4mm or 3.8mm
Moderate Difficulty (Try After Mastering Basics)
Foundational Hand is clean, readable, and demands a consistent 30-degree pen angle, but the letterforms themselves are simple and systematic. With proper paper rotation it's well within reach for left-handers, and the structured approach actually accelerates good habits. Reach for a Pilot Parallel Pen 3.8mm.
Uncial is more forgiving than it looks. The rounded letters depend less on precise pen angles and avoid the long sharp hairlines that punish a wrong-angled left-handed nib. Many lefties find Uncial easier than the more formal scripts. A Pilot Parallel 3.8mm or a Speedball C-series nib both work well.
More Challenging (Save for Later)
Copperplate and Spencerian both lock you into a tight 52-55 degree pen angle and rely on a pushing motion that runs against a left-hander's natural travel. They're absolutely learnable - just don't start there. Get comfortable with brush lettering or Italic first, then pick up a left-handed oblique holder fitted with a Nikko G nib before taking Copperplate seriously.
Gothic and Blackletter are similarly angle-specific (usually 40-45 degrees) and built from complex stroke sequences in dense, geometric letters. They reward precise pen control rather than improvisation, so most left-handers do better approaching them after a stretch of Foundational or Italic work. A Pilot Parallel Pen 3.8mm or 6.0mm handles the broad strokes well.
Want to explore different styles? Use our cursive generator to see how various scripts look before committing to learning them. You can also check our comprehensive calligraphy alphabet guide to see letter forms for different styles.
Practice Strategies for Left-Handed Calligraphers
Effective practice builds muscle memory faster than long, unfocused sessions.
Research on motor skill acquisition (Journal of Motor Behavior, 2018) shows that distributed practice—short, frequent sessions—produces better results than massed practice. For left-handed calligraphy, where you're retraining natural hand positions, this principle becomes even more important.
Start with Basic Strokes, Not Letters
Master vertical lines, curves, and ovals before attempting full letters. Spend 5-10 minutes each session on basic strokes. Focus on consistent pressure, smooth motion, and maintaining proper pen angle. These fundamental shapes form the building blocks of every letter, and perfecting them now saves frustration later.
Practice 15-20 Minutes Daily (Not 2 Hours Weekly)
Your brain consolidates motor skills during sleep. Short daily sessions give your neural pathways time to strengthen between practices. 15 minutes every day beats a 2-hour marathon session once a week. Set a timer, practice with focus, then stop. Quality over quantity. Consider using our 30-day practice calendar to stay consistent.
Record Your Hand Position on Video
Set up your phone and record yourself writing for 30 seconds. Then watch the playback. Are you hooking your hand? Is your wrist straight? Is the paper at the right angle? You can't see these issues while you're writing, but they're obvious on video. Record weekly to track improvement.
Join Left-Handed Calligraphy Communities
Search for "left handed calligraphy" on Instagram, Reddit (r/Calligraphy), or Facebook. Seeing other lefties' techniques, setups, and progress keeps you motivated. Ask questions, share struggles, celebrate wins. The calligraphy community is genuinely helpful, and left-handed calligraphers understand your specific challenges.
Track Progress with Photos, Not Feelings
Take a photo of your work every week. Date it. After a month, compare Week 1 to Week 4. The improvement will be obvious, even though day-to-day progress feels invisible. This tangible evidence keeps you going during frustrating plateaus. Some days you'll feel like you're getting worse—the photos prove otherwise.
Practice Problem Letters Separately
Everyone has letters that feel awkward. For left-handed writers, it's often letters with lots of rightward motion (like 'k', 'v', 'w'). When you identify your problem letters, dedicate 5 minutes to only those letters. Fill a page with just 'k's. Muscle memory develops faster with repetition. Check our common calligraphy mistakes guide for troubleshooting tips.
Be Patient—Left-Handed Learning Has a Different Curve
Here's the honest truth: the first 2-3 weeks feel harder for left-handed beginners because you're adapting systems designed for right-handed people. But after that initial adjustment, left-handed calligraphers progress just as fast as right-handed ones. Some even develop unique advantages—you'll learn creative problem-solving that makes you better at adapting techniques. Celebrate small wins. Every session where you maintain proper paper angle is a victory.
Common Mistakes Left-Handed Calligraphers Make (And How to Avoid Them)
These are the mistakes I see repeatedly in left-handed students. Knowing about them in advance helps you avoid weeks of frustration.
Many left-handed beginners watch tutorials designed for right-handed calligraphers and try to mirror the techniques exactly. This doesn't work. The pen angle, hand position, and stroke direction are all reversed. The fix: Seek out left-handed specific tutorials, or mentally adapt right-handed instructions by rotating everything clockwise.
Regular India ink or cheap fountain pen ink takes 15-30 seconds to dry. You'll smudge every other word. The fix: Invest in quick-drying inks (Higgins Eternal, Speedball Super Black, iron gall ink). A $10 bottle removes the friction point that derails most left-handed beginners.
Some left-handed beginners think they can power through with standard paper positioning. They can't. Paper rotation is THE single most important adjustment for left-handed calligraphy. The fix: Rotate your paper 45-60 degrees clockwise every single session until it becomes automatic.
These pointed pen scripts are the hardest styles for left-handed beginners. They require precise angles and delicate pressure control. Starting here is like learning to drive on a motorcycle. The fix: Begin with brush lettering or Italic. Build confidence and technique, then tackle pointed pen styles with a left-handed oblique holder.
Resting your hand directly on the paper transfers oils and causes smudging no matter how fast your ink dries. The fix: Always place a clean sheet of paper under your hand. This simple habit eliminates hand-oil smudging and gives you a clean writing surface.
For more detailed troubleshooting, see our guide on common calligraphy mistakes that covers issues for both left and right-handed writers.
You're in Excellent Company
Plenty of professional calligraphers are left-handed. Patricia Lovett (whose work appears in the British Library), Melissa Esplin (wedding calligrapher with 200k+ Instagram followers), and numerous IAMPETH master penmen are all lefties. They didn't get there despite being left-handed—they got there by mastering left-handed adaptations.
Once you master the techniques in this guide, being left-handed becomes an advantage. You'll have developed problem-solving skills that make you better at adapting to new styles and techniques. You'll understand pen angle and paper positioning at a deeper level than many right-handed calligraphers because you had to think about it deliberately.
Left-handed calligraphy isn't a limitation—it's a different path to the same beautiful destination. The initial learning curve is steeper, but the results are identical. Give yourself those first 3-4 weeks to adjust, practice consistently, and trust the process.
Your Next Steps
Ready to start your left-handed calligraphy journey? Here's what to do next:
1. Get Your First Tool
Buy a Tombow Fudenosuke hard tip brush pen ($3-5). This is the best beginner tool for left-handed calligraphers. Don't overthink it—just get one and start practicing.
2. Create Practice Sheets
Use our practice sheet generator to create custom guidelines for your first practice sessions. Start with basic stroke practice sheets.
3. Join the 30-Day Challenge
Follow our 30-day calligraphy challenge for structured daily practice. It's designed to build skills progressively and keep you motivated.
4. Explore Different Styles
Use our cursive generator to visualize different calligraphy styles and find ones that appeal to you. Start with modern calligraphy or Italic.
5. Learn the Fundamentals
Read our complete beginner's guide to understand basic calligraphy principles, then return to this left-handed guide for specific adaptations.
6. Consider Taking a Workshop
Look for local calligraphy classes that welcome left-handed students, or seek online courses specifically for lefties. Personalized feedback accelerates your progress significantly.
Remember: every expert calligrapher started exactly where you are now. Being left-handed adds a few extra steps at the beginning, but it doesn't change your potential. Give yourself grace during the first month, practice consistently, and enjoy the process.
Want to explore the broader world of calligraphy? Check out our guides on wedding calligraphy, turning calligraphy into a business, and the rich history of calligraphy.