
Affiliate Disclosure: This page contains affiliate links to products selected for practical fit. When you purchase through these links, we may earn a commission at no additional cost to you. Recommendations are based on the registry's stated features, price, level, pros, cons, and best-for labels. We do not imply hands-on testing without an explicit page-level record. See our complete Tools Guide for comparison notes and selection criteria.
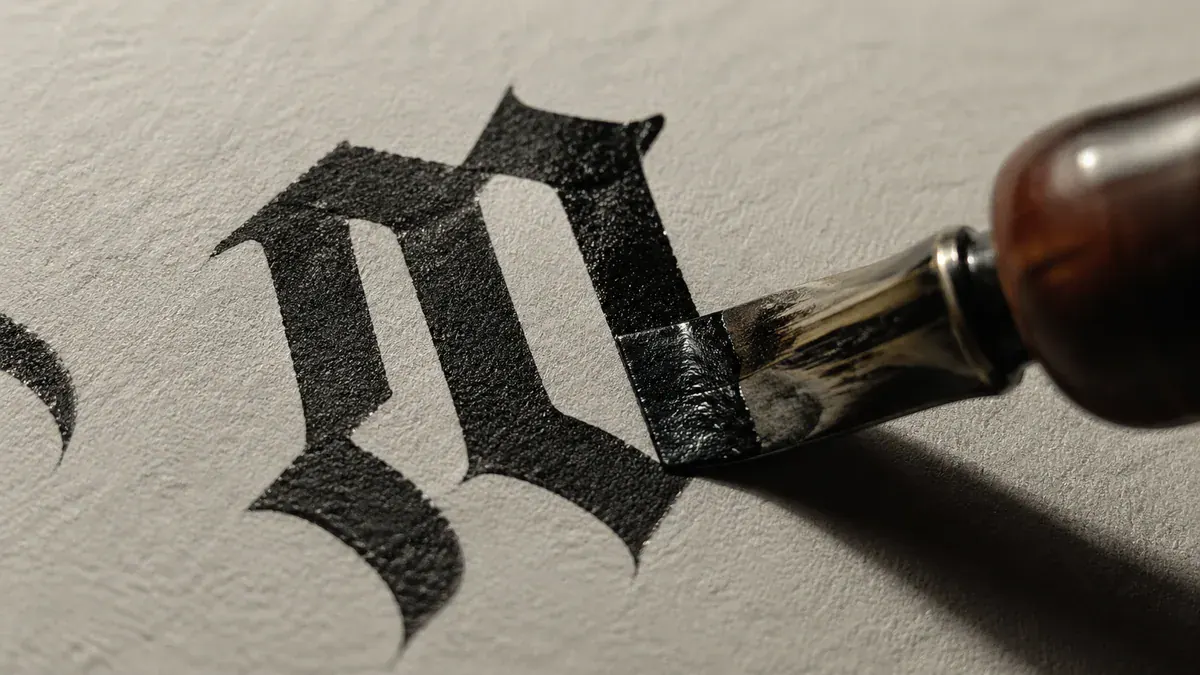
Blackletter calligraphy is the gothic script family behind medieval manuscripts, early printed books, and the dramatic alphabets many people simply call "Old English." It looks severe at first, but the system is practical: hold a broad-edge nib at a steady angle, build letters from repeated vertical strokes, and let the white space do half the work.
What blackletter is
Blackletter is not one alphabet. It is a group of western European book hands that grew out of the Carolingian and early Gothic writing traditions between the 12th and 16th centuries. Scribes used it because parchment was expensive and books were copied by hand. The compressed letters packed more text onto a page while still looking formal enough for scripture, law, university texts, and official records.
The name comes from the page color. Dense strokes made a manuscript page look darker than earlier round hands. That dark texture is why Textura, the most famous blackletter style, got its name. When you compare blackletter with Italic calligraphy, the family resemblance is clear: both use broad-edge nibs, but Italic opens the letters and moves quickly, while blackletter stacks strokes close together and asks for control. For a wider map of where it fits, start with the calligraphy styles hub.
Blackletter also matters because it bridged handwriting and printing. Johannes Gutenberg's 42-line Bible used a Textura-inspired typeface because readers already associated that dark, formal texture with important books. Later German printers and scribes developed Fraktur and Schwabacher forms, which stayed in use for printed German well into the 20th century. If you want to compare gothic hands with other broad-edge and pointed-pen families, our calligraphy styles guide is the natural companion to this lesson.
Major blackletter styles and how to recognize them
The easiest way to understand blackletter is to look at the rhythm of its strokes. Some styles are narrow and fence-like. Others are rounder, more cursive, or more decorative. Learn the differences before you pick a practice alphabet, because each style teaches a slightly different habit.
Textura or Textualis
Textura is the classic gothic book hand: upright, compressed, and built from repeated minims, the short vertical strokes seen in letters like i, m, n, and u. It was used heavily in high medieval liturgical books and formal manuscripts. You can recognize it by its sharp feet, diamond-like serifs, narrow counters, and the woven texture formed when lines of writing sit close together.
Textura is the best first blackletter style if you like rules. The letters are modular. The downside is readability. Words with many minims can turn into a row of black pickets if spacing is careless, which is why historical scribes relied on rhythm, abbreviation marks, and context.
Rotunda
Rotunda developed in southern Europe, especially Italy and Spain, where scribes preferred rounder forms. It was used for books, legal documents, and humanist-era manuscripts that needed dignity without Textura's severe density. Rotunda letters keep the broad-edge contrast but open the counters. The o looks rounder, the bowls breathe, and the writing feels warmer on the page.
Choose Rotunda when legibility matters. It is useful for certificates, menus, invitations, and modern pieces where the client wants a medieval feeling but still needs guests to read the names without squinting.
Bastarda and Schwabacher
Bastarda sits between formal book hand and everyday writing. It appeared in late medieval France and Burgundy, then related forms spread across Europe. The letters are narrower than Rotunda but more lively than Textura, with loops, joins, and occasional cursive movement. Schwabacher, the German cousin many people group with Bastarda, became common in early German printing before Fraktur took over.
You can spot Bastarda and Schwabacher by their movement. The forms are still gothic, but they do not stand as stiffly as Textura. Lowercase letters often have small loops or swinging exits. Capitals feel less like manuscript architecture and more like lettering for a page that needs personality.
Fraktur
Fraktur is the broken script most associated with German books, broadsides, and later national typography. It developed in the early 16th century and remained influential for centuries. The name comes from the fractured look of its curves. Instead of smooth rounded bowls, Fraktur breaks curves into angled parts, then offsets that severity with branching capitals and lively ascenders.
Fraktur is beautiful but not the easiest starting point. The lowercase alphabet borrows from Textura, yet the capitals have their own logic. Learn Textura first, then move into Fraktur when you can keep angle, spacing, and stroke weight stable without thinking about every mark.
Essential tools for blackletter
Blackletter is a broad-edge script, so the nib does the heavy lifting. A pointed pen will not create true gothic strokes, and a flexible nib will fight the construction. You want a flat edge that produces a thick stroke when pulled downward and a thin stroke when moved sideways.
A Pilot Parallel 6mm pen is the cleanest beginner option. The cartridge system is less messy than a dip pen, the edge is crisp, and the 6mm width makes construction mistakes easy to see. If you want a traditional setup, a Brause Bandzug nib around 5mm is excellent. The built-in reservoir gives steady ink flow, which matters when you are writing long vertical strokes.
For ink, choose something dark and heavy-bodied enough to make a solid black stroke without feathering. Kuretake sumi ink gives a deep black and works well with broad-edge dip nibs. Moon Palace sumi is another strong choice if you like a slightly richer body. Avoid watery fountain-pen ink in dip nibs at first; it can look pale and may flood the page if your paper is too absorbent.
Paper should be smooth, bleed-resistant, and sturdy. Vellum-finish practice paper is useful because it slows the nib just enough to teach control. Our paper guide compares surfaces for practice and finished work. For finished work, Strathmore Bristol Smooth 300 Series has the weight and surface to handle dense black strokes. If you are testing drills, a Rhodia dot pad is cheaper and makes spacing easier. Compare options in the pen comparison guide and make custom guidelines with the practice sheet generator.
Blackletter Starter Kit
Everything you need to start writing gothic scripts — a parallel pen for crisp blackletter strokes, traditional broad-edge nibs, sumi ink, and Bristol smooth paper that handles dense ink without bleed
Pilot Parallel Calligraphy Pen Set
Premium calligraphy pen set featuring 4 different nib sizes (1.5mm, 2.4mm, 3.8mm, 6mm) with comprehensive ink cartridge …
Brause Bandzug Nibs
German-made broad-edge nibs with built-in ink reservoir. Known for consistent line quality and excellent ink flow for ex…
Kuretake Sumi Calligraphy Ink (60ml)
Traditional Japanese sumi ink in 60ml bottle, designed for both calligraphy and comic illustration.…
Strathmore Bristol Smooth 300 Series
Heavyweight 270gsm smooth Bristol paper. Plate finish ideal for detailed pen work and pointed pen scripts. Acid-free and…
We may earn a commission when you buy through these links. See all recommendations →
Letter construction: angle, height, and spacing
Most blackletter teaching starts with a 40-45° pen angle. That means the flat edge of the nib sits diagonally to the baseline. Keep that angle consistent as your hand moves. If you rotate the nib during a stroke, the texture changes immediately: vertical strokes get weak, feet become blunt, and the letter loses its gothic snap.
Set your x-height in nib widths. For Textura, four to five nib widths is a practical beginner range. Larger letters make errors visible, while smaller letters demand control you may not have yet. Ascenders and descenders can extend another two to three nib widths depending on the exemplar. The calligraphy alphabet page is useful here because you can compare gothic letter families beside Italic, Copperplate, and modern forms.
Stroke order matters. Build letters from separate, deliberate marks rather than trying to write them like cursive. A lowercase i is a downstroke, a small foot, and a diamond dot. A lowercase n is two minims with a tight angular shoulder between them. A lowercase a starts from an o-like body, then adds a short vertical stem on the right. A lowercase t uses a straight stem, a foot, then a narrow crossbar that should not turn into a modern handwriting flourish.
How to write a Textura lowercase o
The lowercase o is a good first test because it teaches the whole blackletter problem in miniature. It has two vertical sides, a top join, a bottom join, and a narrow counter. It should not become a round modern o. Think of it as a small gothic window.
- Set the nib at 40-45° and draw guidelines for a four-nib-width x-height. Keep your paper slightly turned if that helps your wrist stay relaxed.
- Pull the left minim from waistline to baseline. The stroke should be straight, dark, and even. Add a small angular foot at the baseline.
- Lift the pen. Return to the waistline and make a short top connector toward the right, leaving enough room for a narrow white counter.
- Pull the right minim parallel to the first. If the two sides lean differently, slow down and check that your nib angle has not rotated.
- Close the bottom with a small angular join. Stop before the shape becomes a loop. Textura wants a crisp enclosure, not a balloon.
Practice five rows of o before moving to a, d, g, and q. Those letters share the same body, so the time is not wasted. If your rows start to drift, print fresh guidelines from the practice sheet tool and write fewer, cleaner letters per line.
Practice plan for the first week
Start with short sessions. Blackletter looks mechanical, but your hand still gets tired. Ten minutes of careful strokes is better than an hour of tense writing. Warm up with vertical minims, then practice one letter family. Keep one exemplar beside your page and check it often. The goal is not to memorize a decorative alphabet in a weekend; it is to train your hand to repeat one angle and one rhythm.
On day one, fill a page with minims and diamond dots. On day two, practice i, m, n, and u. On day three, add the o family. Days four and five can focus on ascenders such as l, h, and b. Save capitals for the weekend, and begin with a few simple Textura capitals before attempting Fraktur forms. For more drills, pair this article with stroke practice and the broader techniques guide.
Where blackletter fits with other scripts
Blackletter teaches discipline. It is less forgiving than modern brush lettering and less fluid than Italic, but it rewards close attention. If you already practice Italic, the nib will feel familiar while the spacing will feel stricter. If you come from pointed-pen scripts such as Copperplate or Spencerian, the biggest adjustment is mental: stop thinking about pressure and start thinking about edge angle.
Use blackletter for certificates, title pages, fantasy maps, historical projects, tattoo references, and formal display words. Use it sparingly in long passages unless readability is part of the design plan. A single blackletter heading can look confident; a full page in dense Textura asks a lot of the reader.
The best next step is simple. Pick one style, print guidelines, and write the same five letters for a week. That sounds dull until the texture starts to appear. Then it becomes addictive.