Affiliate Disclosure: This page contains affiliate links to products selected for practical fit. When you purchase through these links, we may earn a commission at no additional cost to you. Recommendations are based on product specifications, community feedback, and fit for common calligraphy needs. See our complete Tools Guide for detailed product reviews.
What Is Procreate Lettering?
Procreate lettering is the practice of creating hand lettering, calligraphy, and brush scripts on an iPad using the Procreate app and an Apple Pencil. Unlike traditional analog calligraphy with dip pens and ink, digital lettering gives you instant undo, layered compositions, and pressure-sensitive brushes that mimic real nibs—all without the mess.
I switched to iPad lettering three years ago after a decade of pointed pen work. The friction vanished: no more ink bleed on cheap paper, no waiting for layers to dry, and I could practice Copperplate drills on the train without hauling a bottle of walnut ink. Procreate became my daily driver for everything from quick concepts to finished client commissions.
Setting Yourself Up
Digital calligraphy rests on three decisions: your device, your app setup, and your brushes. Get these right and you'll spend more time lettering, less time troubleshooting.
1. Choose Your iPad and Apple Pencil
You don't need a maxed-out iPad Pro. The 11th-gen base iPad ($349 with Apple Pencil USB-C) handles every brush I've tested. The iPad Air M3 ($599) adds a bigger screen and better pressure sensitivity. The 13" iPad Pro M4 ($1,299) is my pick for split-screen reference work and ProMotion smoothness, but beginners shouldn't overspend.
Apple Pencil matters more than the iPad model. The Apple Pencil Pro ($129) offers barrel roll and squeeze gestures—handy for rotating brushes mid-stroke—while the USB-C version ($79) covers 95% of lettering needs. Read our full breakdown in Best iPad for Calligraphy.
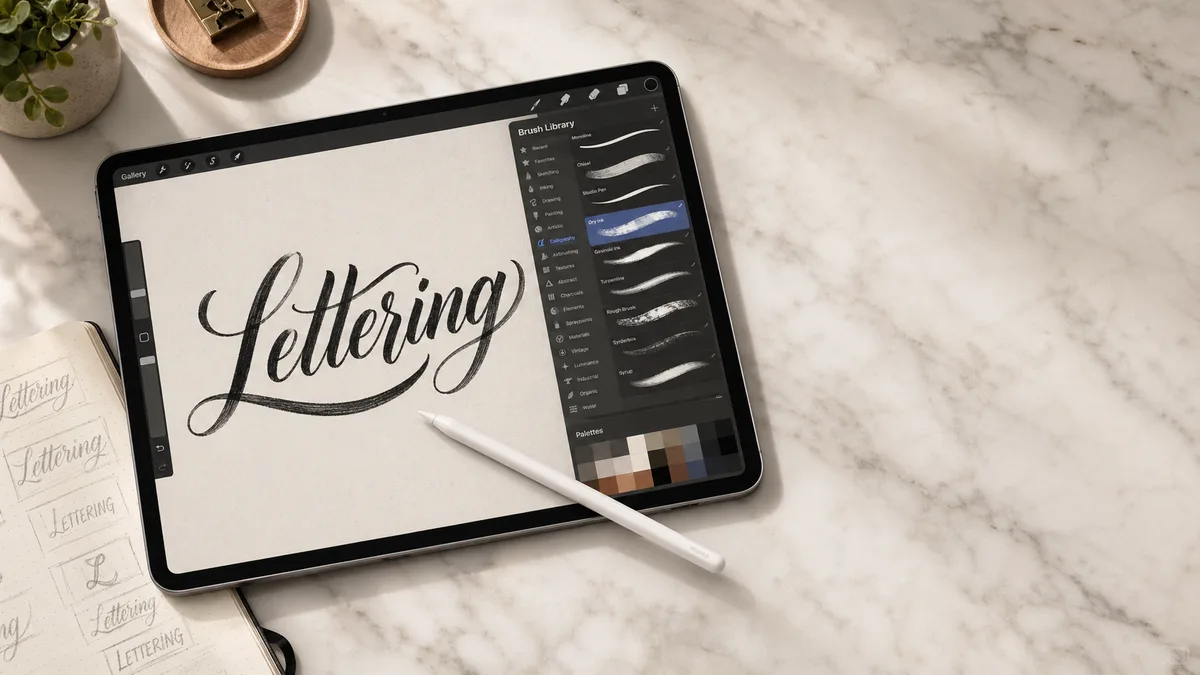
2. Set Up Procreate for Lettering
Out of the box, Procreate's defaults favor illustration. Calligraphers need tighter control: adjusted pressure curves, higher DPI canvases, and custom gesture shortcuts. A proper setup saves hours of frustration—strokes respond predictably, layers stay organized, and export presets remember your settings.
Our Intro to Procreate Calligraphy tutorial covers canvas dimensions (2000×2000px at 300 DPI for Instagram squares, 2480×3508px for A4 print), pressure curve tuning, StreamLine settings for smooth curves, and how to import practice grids as reference layers.
3. Find the Right Brushes
Procreate ships with serviceable monoline and texture brushes, but serious letterers invest in specialty packs. A good modern calligraphy brush mimics flexible pointed pen behavior—thin upstrokes on light pressure, thick downstrokes with weight. Copperplate and Spencerian brushes add historical accuracy with precise hairlines and shaded loops.
Free starter packs exist (search "free Procreate calligraphy brushes" on Gumroad), but premium sets like those from Peggy Dean or The Lovely Lettering Co. include texture overlays, pressure curves dialed to match real nibs, and update support. Expect to spend $8–$25 per pack. We review the top options in Best Procreate Brushes for Calligraphy.
Procreate vs. Traditional Calligraphy
Digital doesn't replace analog—it complements it. I still break out my Nikko G nibs for final pieces destined for framing, and no screen replicates the tactile joy of watching ink flow onto Rhodia paper. But Procreate accelerates learning. Undo lets beginners experiment without fear. Layers let you test color variations in seconds. And you can practice flourishes on a bus without worrying about ink splatters.
Many professionals use a hybrid workflow: sketch and refine layouts in Procreate, then execute the final piece with traditional tools or vectorize in Affinity Designer for print. The Cursive Generator and Font Pairing Assistant help bridge the gap—preview digital fonts alongside hand-lettered elements.
Techniques and Resources
Once you've nailed the basics, explore specialized styles. Monoline lettering (uniform stroke weight) is the easiest entry point—no pressure variation required. Faux calligraphy lets you add thick downstrokes by hand after sketching thin outlines, perfect for brush lettering simulation.
For deeper study, pair iPad practice with book learning. Our Best Calligraphy Books guide includes titles like The Speedball Textbook and Mastering Modern Calligraphy, both of which translate beautifully to digital workflow. Use the Letter Spacing Guide to analyze kerning, then apply those principles in Procreate by toggling on the reference grid.
Advanced users can explore advanced techniques like compound curves, exit-stroke flourishes, and ligature design—all easier to iterate on iPad than paper. Tools like Astropad Studio even let you mirror your iPad as a Wacom-style tablet for desktop design apps, though Procreate's native export to PSD or TIFF usually suffices.
Next Steps
Ready to dive deeper? Start with our step-by-step Procreate setup tutorial—it walks through every setting, from canvas presets to gesture shortcuts. Then grab brushes from our brush pack roundup and choose your hardware with the iPad buying guide.
If you're debating whether to invest in digital tools at all, explore our traditional starter kits first—many calligraphers benefit from a few months of analog practice before switching to iPad. A few months of nib-and-ink work builds muscle memory that translates directly to pressure-sensitive brushes later.